An overview over my personal 3-tier-approach to first aid kits
A word of warning that applies to all out posts about medical stuff: Attend a course! No post on a blog and no video on the internet can replace proper training. While “doing something is always better than doing nothing” there are advanced techniques that actually can do more harm than good when administered wrongly. There’s a reason why there are no decompression needles mentioned in basic first aid courses. The following is just our personal view and we can only show our own approach. If you find something that can help you – great! But don’t get yourself pushed into using gear you’re not comfortable with.
It’s great to see that many “tactical gearheads” started not only carrying knives, flashlights and hanks, but also first aid kits. Since I consider these kits to be one of the most important parts of every day carry, I want to share a bit of my personal setup.
I like to have a “3-tier-approach” to my first aid kit. I recognized that this caters best to my personal situation. I didn’t invent that, “3-tier” is a common approach to tactical gear setups.
Tier 1

A very small pouch containing the bare essentials. If I learned one thing during medical training it’s “assure your own safety before helping others”. So in this pouch there are protective gloves and a face mask for resuscitation. These are the only things you can not improvise and without which you should be very sure that you don’t put yourself in danger when administering first aid.
Since I had some spare room I put in some items that take up to almost no space and come in handy like bandaids and alcohol wipes.
This pouch is so small I can always carry it in my clothes. No matter if I’m wearing my usual cargo pants or had to dress up in a suit.
With this pouch I’m ready for CPR situations and to start with first steps in first aid while calling for help.
Tier 2
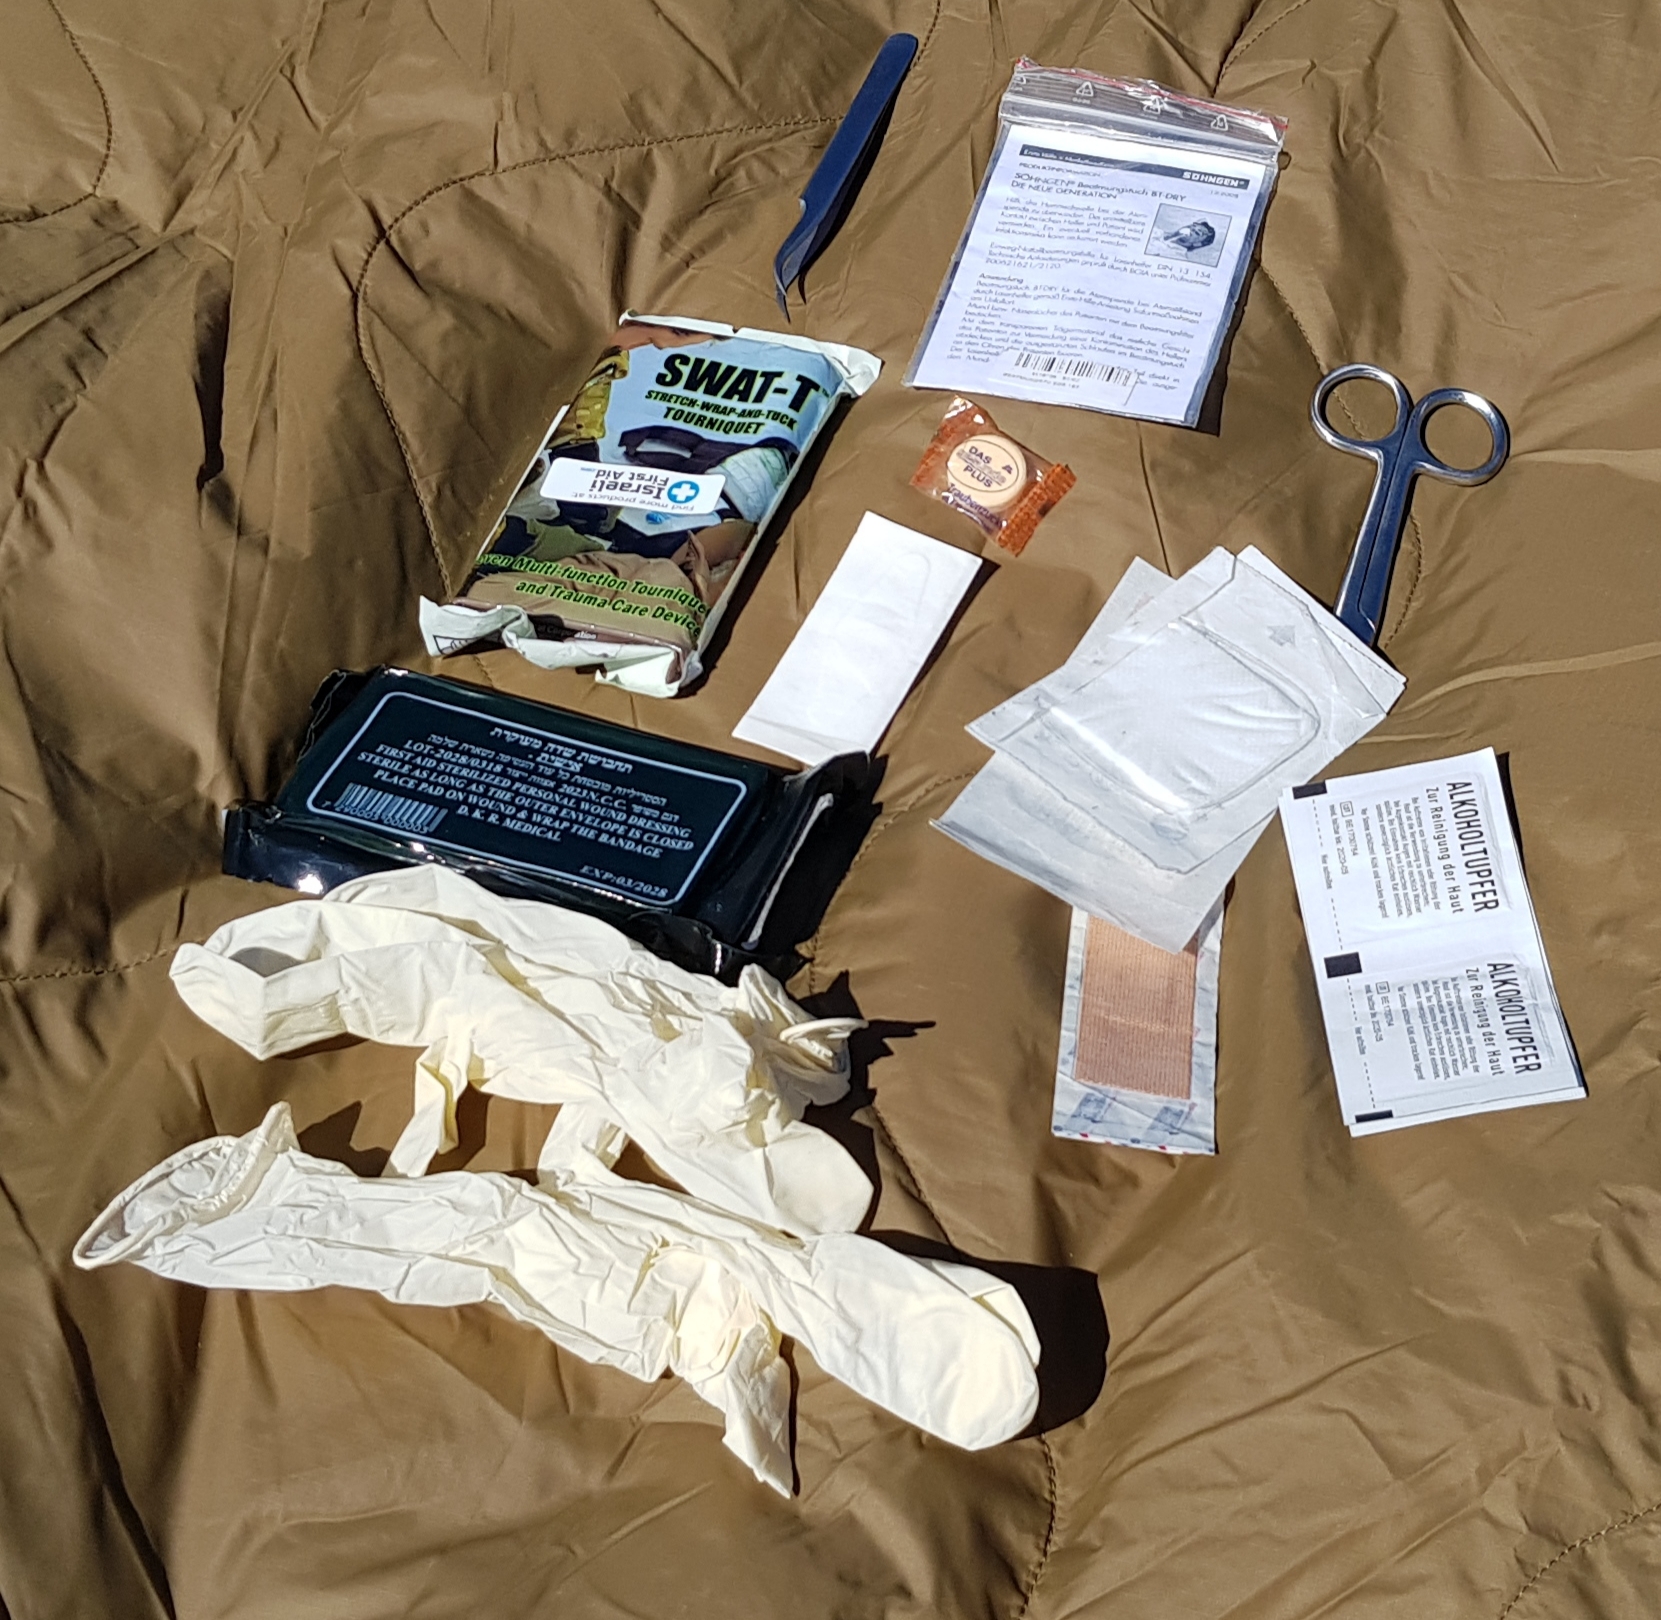
A slightly bigger pouch which holds the “better than nothing” versions of common first aid tools. They are small enough to keep them around most of the times but are still a good compromise when you need more gear. Besides a redundant set of items I also have in the Tier 1 pouch, there’s also a SWAT tourniquet and a small bandage. On the back of the pouch there’s a set of emergency shears.

The tourniquet can help with stopping massive bleeding and the bandage has an attached pad so it can be applied directly to an open wound. The shears help with cutting clothes when a wound is covered and unreachable. It also helps with cutting seat belts, cutting entangled persons lose and shaping bandaids. Why a set of shears when you carry a knife? Emergency shears are built in a way you can cut through clothing without risking to injure the patient.
I keep this pouch in my “main bag” whatever I’m using on that day. Sometimes, when I have to leave my bag behind I switch this pouch into my cargo pants or jacket. Yes, this way I end up with carrying two kits in my clothing’s pockets but I can live with that.
There’s still room for some extra bandaids (even specialized ones like for blisters), some dextrose, tweezers and medication. Might be a good place to store an “ICE” card as well – the pouch I use has a designated slot for that.
I’ll go for a space blanket as well. That’s a very versatile tool.
Tier 3
It depends on the situation what I carry in this tier. While traveling by train this tier consists mainly of a big IFAK (Individual First Aid Kit) pouch I usually attach via MOLLE/PALS to the outside of my backpack. This pouch has yet another set of gloves and face mask and several items which I think are useful during medical emergencies. There’s at least a professional tourniquet like the SOFTT-W or the CAT, chest seals and at least one set of advanced bandages like “Israeli bandages”, Uriel or OLAES. Furthermore I have compressed gauze, antiseptic spray and some medication I might need for my family and myself in it.
When traveling by car I sometimes even have a bigger standalone bag with me I could use when I come by an accident. Same goes for events where I can imagine that I might need a more complete first aid kit like team building events or some sorts of family get togethers.
So this tier can even hold things like splints or combat stretchers. It totally depends on the usecase. Remember that first aid kits that fit into this category also make great additions for your disaster preparations.
Summary
It just doesn’t work very well to have a single big IFAK pouch with you all day. It’s uncomfortable and you get very strange looks. There’s a big chance you’ll leave it behind eventually and then you’ll end up with no kit at all. With the combined set of all three tiers I’m convinced I’m good to always have the best kit possible that fits the current situation.

I like to think that it even adapts to the risk at hand. I’ll leave my bag with Tier 2 behind only for short ways between an office room and the toilets or a nearby meeting room. If I’m going on a lunch break a bit more far from my desk, Tier 2 has me covered. For commutes to the office or from a hotel to a customers I always have my bag and Tier 1 & 2. For longer journeys or special events I just add Tier 3.
The main reason why I have gloves and masks in every tier is not so much because I could forget to take one of them with me but more because these things tend to rip apart when you really can’t need it. Or I might give them to other people helping who didn’t think of carrying a first aid kit. Having tourniquets and bandages in tier 2 and 3 doesn’t mean I just go for the best one I actually carry but it helps with treating multiple injuries, possibly on multiple persons.
When building first aid kits I go for the bare life saving essentials I might need to cover the time between when an accident occurs and professional medical services arrive. All other things like bandaids are optional in my opinion and I just add them if there’s still space.
More on the specific setups can be found in my personal blog and could be a topic of upcoming posts.
About the author
widhalmt is what you might call a tactical gearhead with a focus on collecting. Like your average nerd he likes to dig into topics he’s interested in and learn as much about them as possible. Then he tries to get hold of his items of interest (he’s quite picky about brand and model when he chose a certain item) and put them to the test. Be it while walking the dog in the woods or go for overnighters outdoors.
In his daytime job he works as lead support engineer for an open source IT consulting company. Since his work involves a lot of travelling and going to customers he has quite some experience in choosing items that are rugged enough for constant travelling but still work in an office environment without offending anyone by being “too tactical” (although he tends to stretch that last part a bit). It’s safe to say that he has some tactical gear on him when he walks out the door (and sometimes even when he stays at home).
In tactical gear he has very widespread interests but if he had to pick something, it’s be knives, bags/backpacks and camo patterns (especially PenCott)